How to build blog with Jekyll
Installation
- First step is to set up the environment with ruby (2.5.0 or higher). Depending on your OS there are couple of ways to install ruby on your local machine. For this article we will be focusing on windows. For different operations systems refer to this Ruby Installation
- Install RubyGems, GCC and Make
-
Once the ruby in installed next step is to install jekyll
gem install bundler jekyll -
Once jekyll is installed, we will use the jekyll cli to create our blog site.
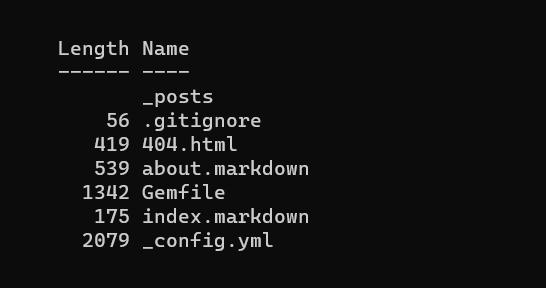
jekyll new my-blog - This will create the folder my-blog in the current working directory. In the my-blog folder you
will see autogenerated directories and files which is the skeleton of the jekyll site.
-
Next step is to build all the dependencies for jekyll which can be found in the Gemfile. Run the terminal in admin mode.
cd my-blog
bundle install
bundle exec jekyll serve
This will start serving the files are http://localhost:4000. This will create _site folder which will contain all the compiled files to serve
Minima theme update
As of writing Jekyll uses minima theme (v2.5.1). We will use the latest version of minima theme. As it provides pagination, dark theme, disqus, google analytics and couple of other changes. As the latest version has not been released, so we will fetch the latest from GitHub. Update the minima dependency in Gemfile with following
gem "minima", git: "https://github.com/jekyll/minima"
Understanding the structure
-
_post folder contains all the posts. All the posts should follow the naming convention. YYYY-MM-DD-
.markdown. e.g. 2023-03-14-welcome-to-jekyll.markdown. -
_site folder contains all the compiled pages. By default all the posts are categorized via category/YYYY/MM/DD/name_of_file. This is also the URL for the post. Auto generated post under the _posts folder have 2 categories i.e. jekyll and update. On expanding the _site folder we can see the path of our post
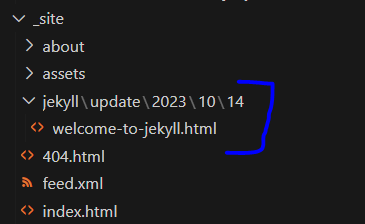
This path can be configured using _config.yml file.
Configuration
All the configurations are handled by _config.yml file. Remove twitter_username and github_username as they are deprecated in the latest minima theme.
- Enable dark mode and social links
minima: skin: auto date_format: "%b %-d, %Y" social_links: - { platform: github, user_url: "<github_profile_page>" } - { platform: twitter, user_url: "<x_profile_page>" } - Add author details
   author:
     name: Your Name
     email: youremail@email.com
Create Posts
- Create new markdown file under _posts folder and add front matter to top of the file with following name 2023-10-14-my-first-post.markdown.
--- layout: post title: "How to build blog with Jekyll" date: 2023-10-14 13:31:06 -0500 summary: How to build blog with Jekyll categories: jekyll blog --- - Below the front matter write your post.
- New post will be created under jekyll/blog/2023/10/14/my-first-post.html under the _sites folder.
- Hit refresh and new post will show up on localhost:4000.
Draft Posts
To create a draft post, create _drafts folder at root level. Create a post under _drafts folder. Draft posts won’t display unless we specify to serve drafts posts. To serve the drafts append –drafts with the serve or build command
bundle exec jekyll serve --drafts
This command will serve drafts and now the draft post will be displayed on the home page.
Conclusion
We saw how to create blog site using jekyll and how to use configuration for dark mode and create new posts and draft posts. In next post we will see how to host the jekyll site to aws using GitHub action How to deploy Jekyll to AWS with Github actions